
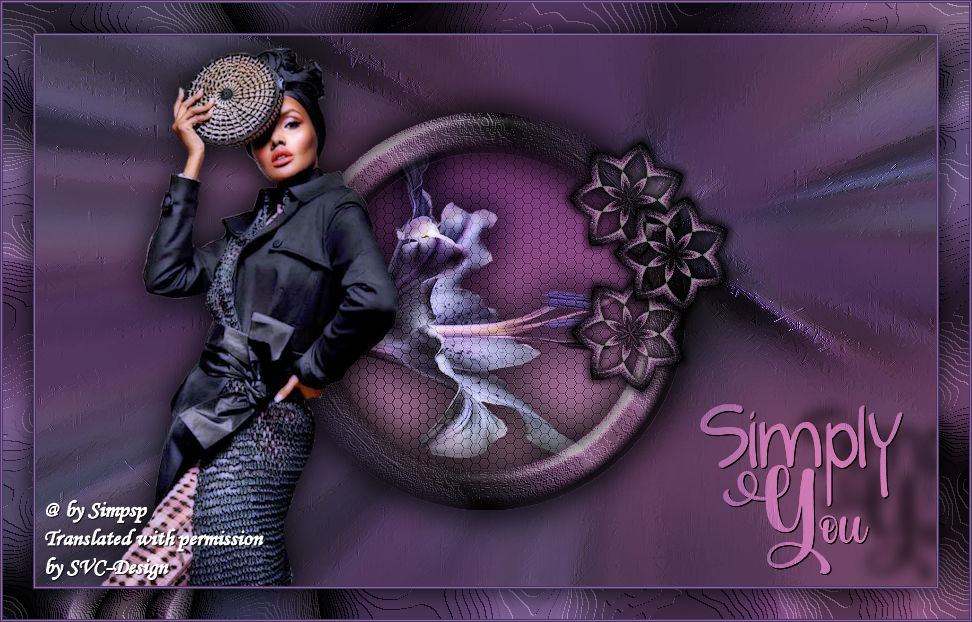
This lesson is made with PSPX9
But is good with other versions.
© by SvC-Design

Materialen Download :
Here
******************************************************************
Materials:
Calitubes_447mulheres.pspimage
Callitubes-54flores.pspimage
TituloSYByXiki.png
******************************************************************
Plugin:
Plugins - Filters Unlimited 2.0 - Deformation - James Bondage
******************************************************************
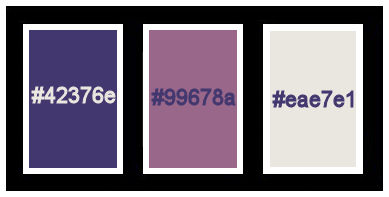
color palette
:
******************************************************************
methode
When using other tubes and colors, the mixing mode and / or layer coverage may differ
******************************************************************
General Preparations:
First install your filters for your PSP!
Masks: Save to your mask folder in PSP, unless noted otherwise
Texture & Pattern: Save to your Texture Folder in PSP
Selections: Save to your folder Selections in PSP
Open your tubes in PSP
******************************************************************
We will start - Have fun!
Remember to save your work on a regular basis
******************************************************************
1.
Choose 3 colors to work with:
Foreground: #42376e
Background: #99678a
Color 3: #eae7e1
2.
Open a new transparent image of 900x550px
Paint with the color of the Background.
Layers - New Raster Layer.
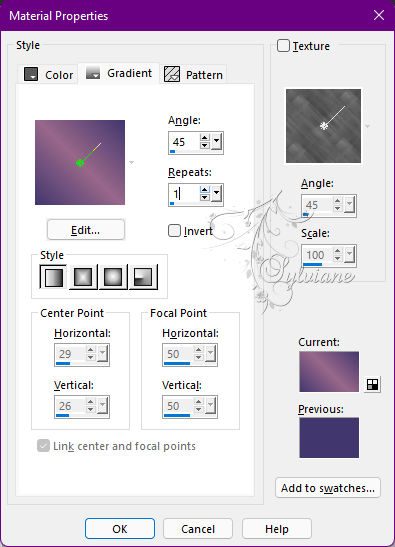
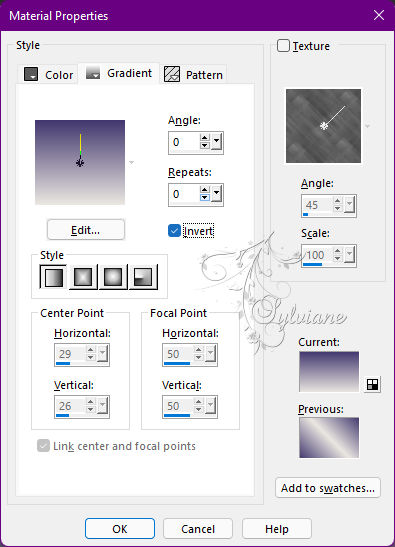
Paint with a Linear gradient formed by the colors of foreground and background:
3 .
Selections - Select All.
Open Callitubes-54flores.pspimage
Edit - Copy
Edit - Paste Into Selection.
Selections - Select None.
Effects - Image Effects - Seamless Tiling: Default
4.
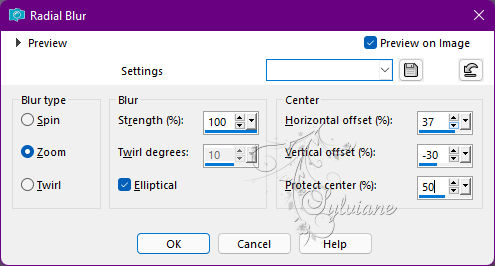
Adjust - Blur - Radial Blur
5 .
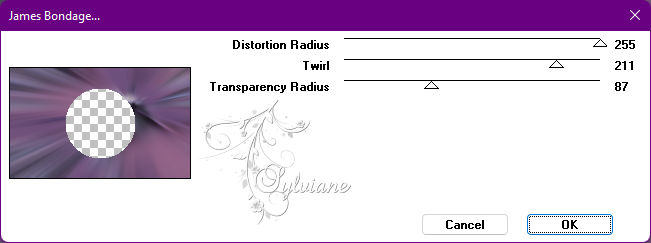
Plugins - Filters Unlimited 2.0 - Deformation - James Bondage
6 .
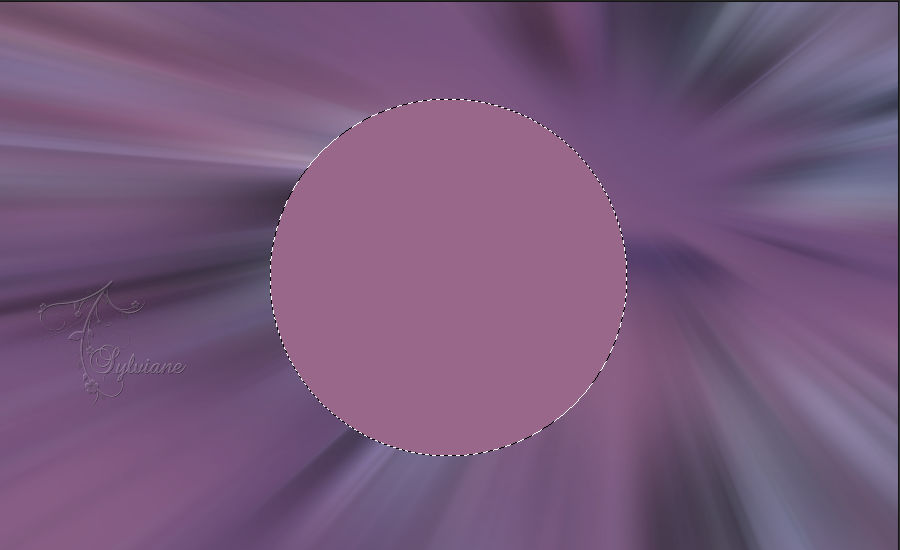
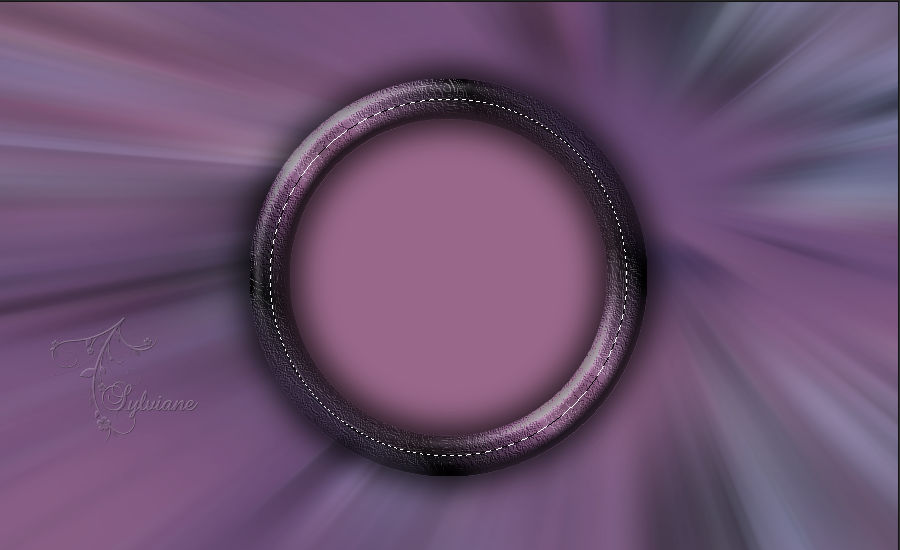
With Magic Wand: Tolerance and Feather: 0, select the circle.
Selections - Modify - Select Selection Borders
7.
Layers - New Raster Layer.
Paint this selection with the gradient in use.
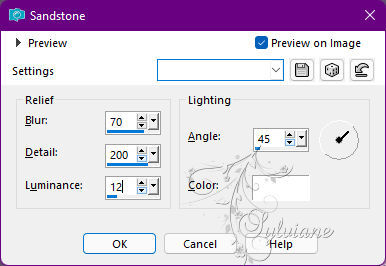
Effects - Texture Effects - Sandstone
8.
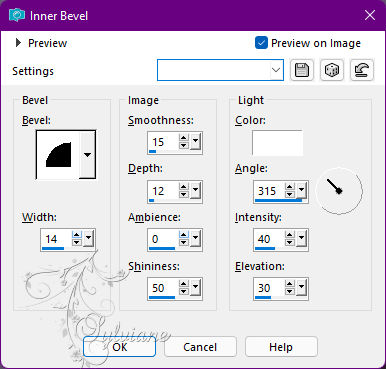
Effects - 3D Effects - Inner Bevel:
Selections - Select None.
Effects - 3D Effects - Drop Shadow:
0/0 /100 / 45 - Color: #000000.
Edit - Repeat Drop Shadow.
9.
Activate Layer Raster 2.
With Magic Wand: Tolerance and Feather 0, select the circle
Layers - New Raster Layer.
Open Callitubes-54flores.pspimage
Edit - Copy
Edit - Paste Into Selection.
Adjust - Sharpness - Sharpen.
10.
Layers - New Raster Layer.
Paint this selection with a Linear gradient formed by the colors of the Foreground and the Third color
11.
Effects - Texture Effects - Tiles
Color: Background color
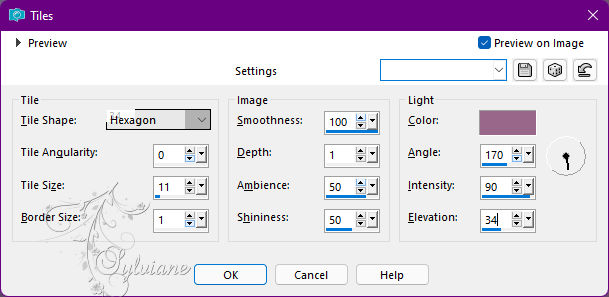
Blend Mode: Soft Light.
Adjust - Sharpness - Sharpen.
Selections - Select None.
12.
Activate the Floral Tube Layer.
Effects - 3D Effects - Drop Shadow
0/ 0/ 100/ 45 - Color:#000000.
Edit - Repeat Drop Shadow.
13.
Activate Layer Raster 3.
Layers - Duplicate.
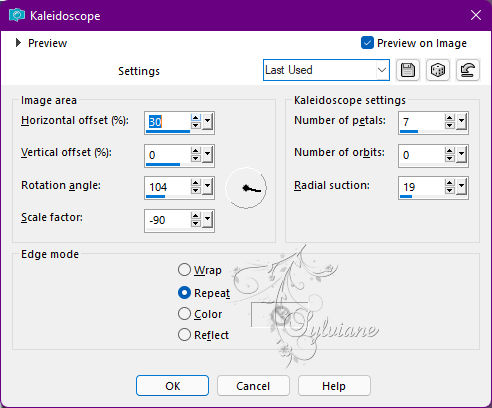
Effects - Reflection Effects - Kaleidoscope
14.
Activate selection tool (Press K on your keyboard)
And enter the following parameters:
Pos X : 520 – Pos Y :93
Press M.
Layers - Duplicate.
Activate selection tool (Press K on your keyboard)
And enter the following parameters:
Pos X :552 – Pos Y :227
Press M.
Layers - Duplicate.
Activate selection tool (Press K on your keyboard)
And enter the following parameters:
Pos X :565 – Pos Y : 148
Press M.
15.
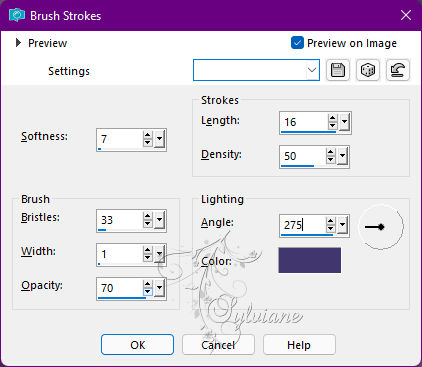
Activate Layer Raster 2.
Effects - Art Media Effects - Brush Strokes:
Color: Foreground color
16.
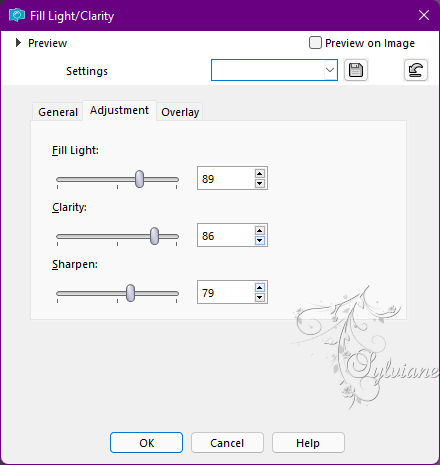
Layers - New Adjustment Layer - Fill Light/Clarity

17.
Activate the Top layer
Open Main Tube.
Edit - Copy
Edit - Paste as New Layer.
Position to the left.
Apply Drop Shadow or effect you want.
18.
Open TituloSYByXiki.png
Edit - Copy
Edit - Paste as New Layer
Activate selection tool (Press K on your keyboard)
And enter the following parameters:
Pos X :644 – Pos Y : 368
Press M.
Blend Mode: Overlay.
Effects - 3D Effects - Drop Shadow:
1/ 1/ 100/ 0 - Color: #000000.
Effects - 3D Effects - Drop Shadow:
5/10/45/ 20 - Color: #000000.
19.
Edit - Copy Special - Merged Copy
Image - Add Borders – Symmetric - 1px - Color: Foreground color
Image - Add Borders – Symmetric - 1px - Color: Background Color
Image - Add Borders – Symmetric - 1px - Color: Foreground color
Selections > Select All.
Image - Add Borders – Symmetric - 30px with any color
Selections - Invert.
Edit - Paste Into Selection.
20.
Adjust - Blur - Gaussian Blur: 30.
Effects - Texture Effects - Sandstone:
Color: #ffffff
21.
Selections - Invert.
Effects - 3D Effects - Drop shadow:
0/ 0/ 100/ 40 - Color: #000000.
Edit - Repeat Drop Shadow.
Selections - Select None.
22.
Image - Add Borders – Symmetric - 1px - Color: Foreground color
Image - Add Borders – Symmetric - 1px - Color: Background Color
Image - Add Borders – Symmetric - 1px - Color: Foreground color
23.
Apply your watermark or signature
Layer – merge – merge all (flatten)
Save as JPEG
Back
Copyright Translation © 2022 by SvC-Design